
DIY - Temporary RV Tail Light Cover
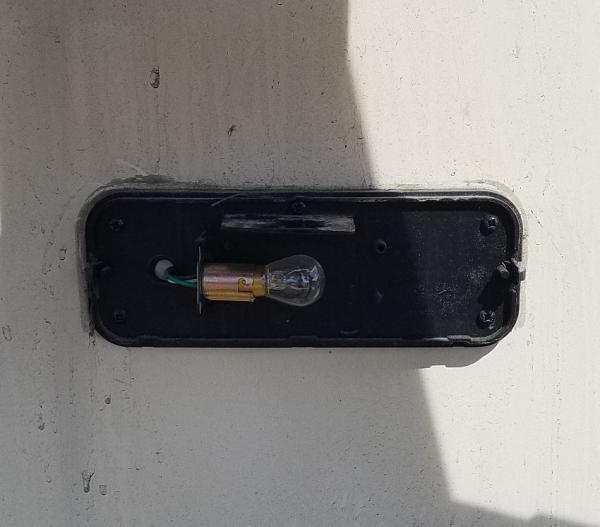
When we setup camp in Kansas I noticed our right tail light cover was missing on the fifth wheel. We'd checked our lights in the am, so it had parted ways with us at some point between Nebraska and Kansas. We'd already designated a day of rest while in Kansas to shop and do laundry, so Hub added this to our shopping list. We already had clear and black Gorilla tape on hand.
The top of the existing tail light base has a 1 1/2" x 2" lip for the actual cover to fit on. Hub cut a strip of cardboard long enough to wrap around the square temporary lens, it fit just inside its shallow lip. Hub used clear gorilla tape to attach the cardboard. Next, he applied black gorilla tape around the existing base to provide something for the black lens tape to stick to. Hub was creating all this in high wind that pushed the AC unit run off onto him and his work area so he also made a rain guard from more cardboard to keep the work area as dry as possible.
He ended up creating embedded layers of black tape sort of interlocking them to ensure the cover will stay on.
Today we drove over 300 miles and I was relieved to see it was still safely attached upon our arrival at our next campsite in Oklahoma.
I've called Grand Design and have instructions on how to get a replacement cover, but I cannot submit it until we get to Florida.
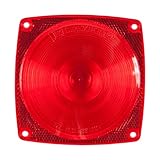 Blazer B983 Stop/Tail/Turn Light Replacement Lens - Square - Red
 Gorilla Crystal Clear Duct Tape, 1.88” x 5 yd, Clear, (Pack of 1)
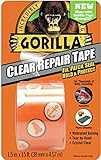
 Gorilla Tape, Black Duct Tape, 1.88" x 35 yd, Black, (Pack of 1)
Thanks for stopping by, please feel free to leave comments or questions, I am here to help!
~Tracy
Add new comment